In this tutorial, we will see how to use a REST endpoint to feed an input in the SWAPP. The endpoint will be implemented as a Pipeline Pilot protocol, but could be any other endpoint, provided the CORS requirements are met.
SWAPP Protocol
First of all, we need to define a Pipeline Pilot protocol for the SWAPP. As an example, we will use the demo protocol Load Drugs with REST input located under Protocols/Discngine/TIBCO Spotfire Enabled Protocols/Client Automation/SWAPP Examples/Load Drugs with REST input.

This protocol is fairly simple. It reads the data from the demo input Sample Drugs Reader, filters by Activity Class and adds the data as Data Table and Table Plot in TIBCO Spotfire®.
It also takes two parameters: Activity Class of type String and Minimum Number of Compounds of type Long.
Objective
The options for Activity Class could be hard-coded as Legal Values in Pipeline Pilot. With this example protocol it could be done easily because the Load Drugs with REST input component always outputs the same data. But what if we were reading from a remote Database which content could change over time? In this case, the Legal Values would change and we would need to update the protocol each time.
Instead, we will use the REST API Resource type to dynamically retrieve the list of Activity Class.
The Minimum Number of Compounds will be used later to filter the list further.
Endpoint Protocol
The first thing we need to do is to create the Pipeline Pilot Protocol which will generate the list of Activity Class available.
It can be found under Protocols/Discngine/TIBCO Spotfire Enabled Protocols/Client Automation/SWAPP Examples/REST Resource.

Let's see what it does.
-
First, we load data from the Load Drugs with REST input component and group it by Activity Class.
-
We have a Filter component but let's skip it for now, we'll get back to it later.
-
We define two properties:
- label will be the displayed name in the form, we define it to be activityClass and NumberInGroup
- value will contain the string activityClass
-
We pipe all this to Send Options to SWAPP Form component, leaving its parameter Result Property Name to the default value "Response".
-
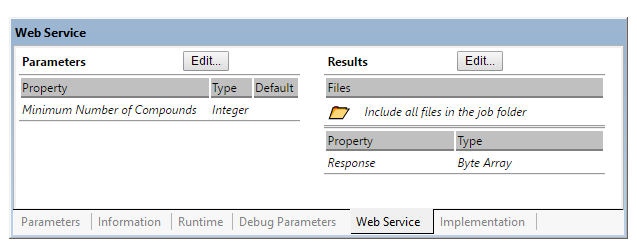
Finaly, we declare the Web Service response of the protocol. Under the Web Service tab, in the Results section, click Edit... and add the property "Response" as Byte Array.
Registering the Protocol in the SWAPP
Everything is now ready to register the protocol in the SWAPP. If you want details on this step, have a look at the corresponding tutorial.
Active Class
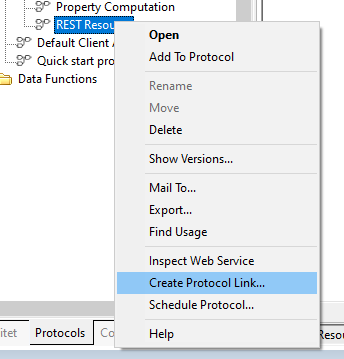
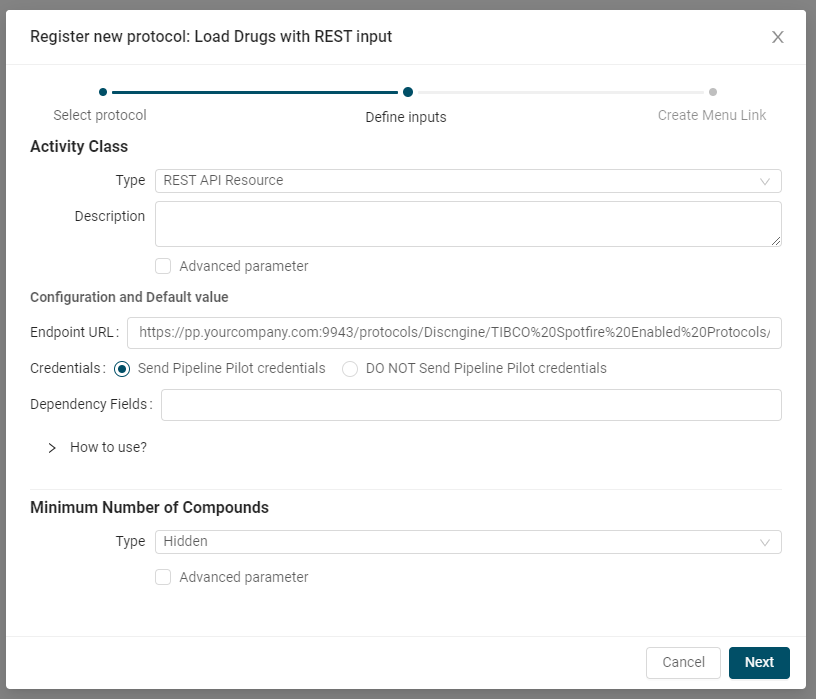
In the second step of the registration, define the Active Class as REST API Resource. For the Endpoint URL configuration option, indicate the URL of the Endpoint Protocol we just created. To get the URL of the protocol, in Pipeline Pilot, right click on it in the explorer tab and click on Create Protocol Link.
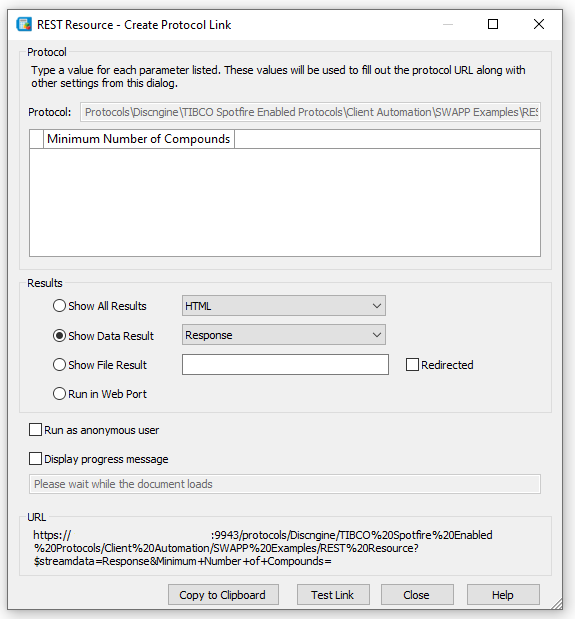
In the popup window, check Show Data Result and select "Response". This will define the "Response" global parameter we defined earlier as the output data. Copy the link at the bottom and paste it under Endpoint URL in the form.
Leave the Credentials option to Send Pipeline Pilot credentials. Since we are calling a Pipeline Pilot protocol, we need to send the credentials as well. Alternatively, you can set the REST Resource protocol to be called anonymously.
Minimum Number of Compounds
For now we won't use the Minimum Number of Compounds so set it as Hidden.
Final Form
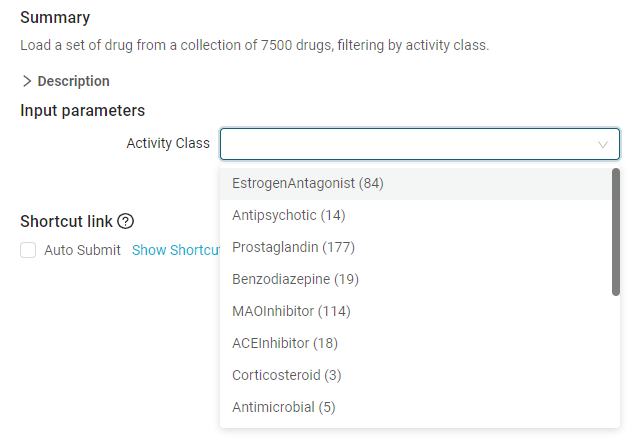
You should end up with something like that:
Complete the registration and open the protocol. You will see that the Active Class input is now populated with the list generated by the REST Resource protocol.
If you want, you can try to add some filtering to it to see how it changes the options.
Defining Dependencies for the REST API Resource input type
We now have a dynamically populated input but we can go even further. Imagine your endpoint protocol returns a list with thousands of options. It will be difficult for the end users to find what they need. What if they could use another input of the form to filter down the options in the list?
That's the purpose of the Dependency Fields option we skipped earlier.
In the REST Resource protocol as well as in the Load Drugs with REST input protocol, we have a parameter called Minimum Number of Compounds. If you look into the REST Resource protocol, you will see that it is used to filter the activeClass parameter to only keep those with at least Minimum Number of Compounds compounds.
Let's edit the form definition to take that into account.
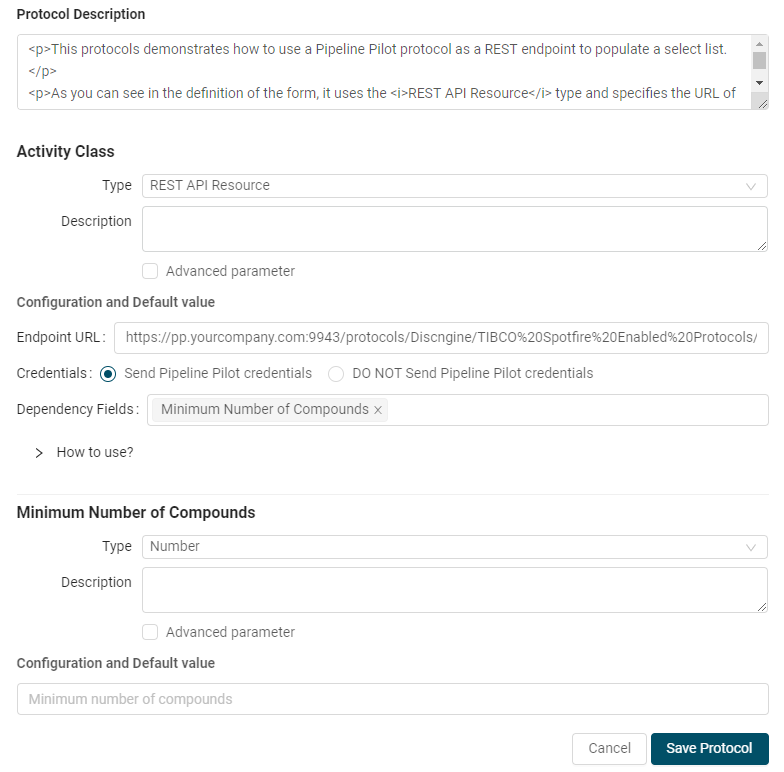
In the form registration, switch the field Minimum Number of Compounds from Hidden to Number.
Add Minimum Number of Compounds as a Dependency Field for the REST API Resource and remove it from the URL of the Endpoint URL. It should eventually look like this:
https://pp.yourcompany.com:9943/protocols/Discngine/TIBCO%20Spotfire%20Enabled%20Protocols/Client%20Automation/SWAPP%20Examples/REST%20Resource?$streamdata=Response
Note we removed &Minimum+Number+of+Compounds=
Save the protocol and open it again.
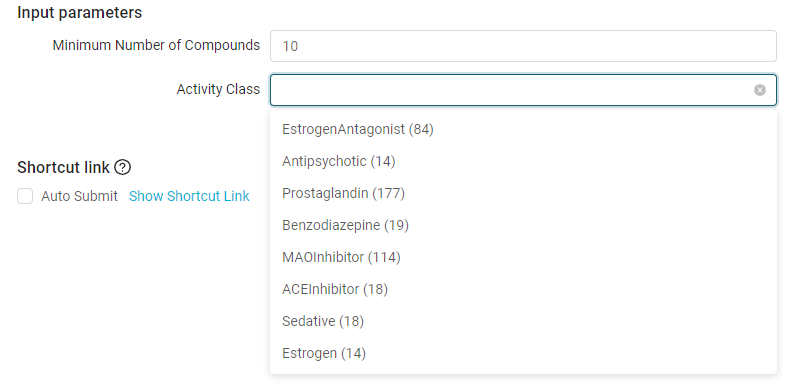
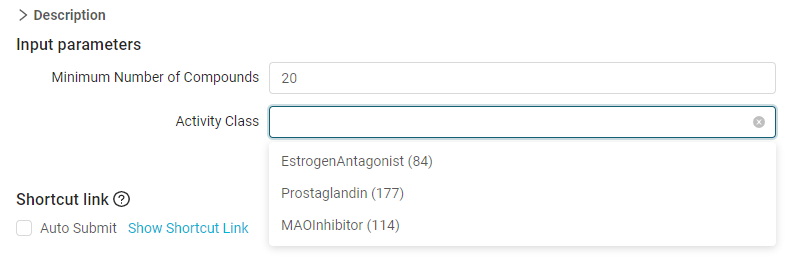
From now on, when you change Minimum Number of Compounds, it will update the list of Activity Class, filtering out only those with at least the required number of compounds.
Implementing dependencies
When defining a REST API Resource field, any other field of the for can be used as a Dependency field. You can even pass multiple dependency fields. The values of all dependency fields will be passed to the Endpoint URL as query params.
To use them in the Endpoint Protocol, make sure they are properly defined as Protocol Parameters and/or read them as Global Properties.